
The first cold morning of the year is when weak batteries give up. You turn the key, the engine cranks slowly or not at all, and you’re late before the day has even started. Learning how to check car battery health takes about 15 minutes, costs less than a tank of gas, and is one of the easiest ways to keep yourself from being dead in the water in a parking lot this winter.
Here at On the Rise, the goal is simple: get the job done right, safely, and without wasting money or time. This guide covers the tools, the safety rules, the exact test and the voltage numbers that tell you whether your battery is ready for cold weather.
Why cold weather exposes a weak battery
A car battery makes power through a chemical reaction, and cold slows that reaction down. According to AAA, at 32°F a battery has only about 65% of the strength it has in warm weather, and at 0°F it has about 40% (AAA). At the same time, cold engine oil is thicker, so your starter needs more power to turn the engine over. You get less supply and more demand on the same morning.
Age makes it worse. AAA puts the typical battery life at 3 to 5 years, with batteries in hot climates often lasting closer to 3 (AAA). Summer heat does the damage, and winter is when you find out. If your battery is more than 3 years old, testing it before the first freeze is non-negotiable.
Battery check tools and checklist
You don’t need a shop’s worth of equipment for this. Here’s the full list:
- Digital multimeter — the core tool. A basic model capable of reading DC volts to 2 decimal places is all you need, usually around $15.00 to $30.00 at an auto parts store.
- Safety glasses — required, not optional.
- Nitrile or rubber gloves — battery acid and corrosion are hard on skin.
- Wire brush or battery terminal brush — about $5.00 to $10.00, for cleaning corrosion.
- Baking soda and water — 1 tablespoon of baking soda in 1 cup of water neutralizes acid corrosion.
- Wrench set — usually 10 mm or 13 mm for terminal clamps, if you need to clean them.
- Clean rag or paper towels.
If you’re still building out your kit, the On the Rise guide to essential tools for everyday tasks covers the basics worth owning. We don’t play brand favorites: any multimeter that reads accurately does this job. Measure twice, buy once.
Know your battery type
Before you test, check the label on top of the battery. Most cars use a standard flooded lead-acid battery. Many newer cars, especially ones with start-stop systems, use an AGM (absorbent glass mat) battery.
This matters because a fully charged AGM battery reads slightly higher at rest, around 12.8 volts, compared with about 12.6 volts for a standard flooded battery. Read your number against the right baseline.
Battery safety: how to check it without getting hurt
A car battery holds enough energy to cause burns, and it can vent hydrogen gas, which is flammable. These rules are not suggestions.
The hard rule is this: never let a metal tool touch both battery terminals at the same time. A wrench bridging the 2 posts creates a direct short, which can weld the tool in place, burn you and damage the battery.
- Wear safety glasses and gloves for the entire job. Battery acid can cause serious eye injury.
- No flames, no sparks, no smoking anywhere near the battery.
- Remove rings, watches and metal bracelets. Metal jewelry can short a terminal against the car’s body.
- Turn the engine off and remove the key before you touch anything under the hood.
- Never test or jump a battery that is cracked, leaking, bulging or frozen. A frozen battery can rupture. If the case looks swollen or you see liquid on it, stop and have it replaced.
- Work in a ventilated space. Open the garage door or work outside.
If you ever need to disconnect the battery for cleaning, remove the negative (black, minus) cable first and reconnect it last. That keeps your wrench from creating a spark against the car’s frame.
How to check car battery voltage: step-by-step
Set aside about 15 minutes. The test is most accurate when the car has been sitting for at least 1 hour, ideally overnight, so the reading isn’t inflated by recent driving.
- Pop the hood and locate the battery (1 minute). Most are under the hood; some cars put it in the trunk or under a seat. Check your owner’s manual if you can’t find it. Why it matters: you need clear access to both terminals.
- Inspect before you touch (2 minutes). Look for cracks, bulging, leaks and white or blue-green crust on the terminals. Corrosion can cause a bad connection that looks like a dead battery. If you skip this step, you can misread a dirty terminal as a failing battery.
- Clean any corrosion (5 minutes, if needed). With the negative cable removed first, scrub the terminals with the baking soda mix and the wire brush, wipe them dry and reconnect positive first, negative last. Clean metal gives you a true reading.
- Set the multimeter to DC volts (30 seconds). Choose the 20V DC range if your meter isn’t auto-ranging. The wrong setting gives you a useless number.
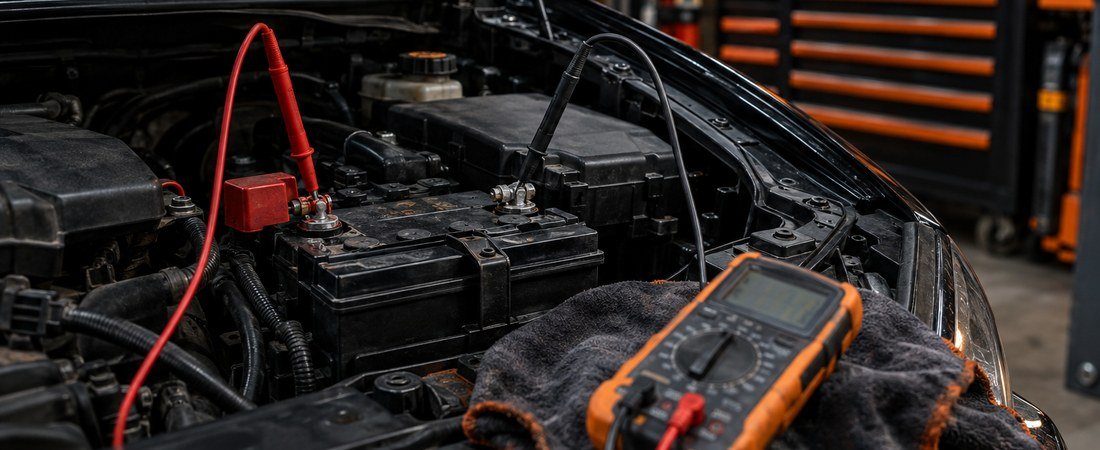
- Connect the probes (30 seconds). Red probe to the positive (+) terminal, black probe to the negative (−) terminal. Keep the probe tips on bare metal.
- Read the resting voltage (30 seconds). Write the number down. This is your battery’s state of charge.
- Do a cranking test (2 minutes). Have a helper start the engine while you watch the meter. The voltage will dip as the starter draws power. A commonly used benchmark is that a healthy battery stays above about 9.6 volts while cranking. If it drops below that, the battery is struggling under load even if the resting number looked fine.
- Check the charging voltage (1 minute). With the engine running, the reading should rise to roughly 13.7 to 14.7 volts. That tells you the alternator is recharging the battery. If it stays near 12.6 volts or lower, the problem may be the charging system, not the battery.
What your reading means
Use this resting-voltage chart for a standard 12V flooded battery:
| Resting voltage | Approximate state of charge | What to do |
|---|---|---|
| 12.6V or higher | 100% | Ready for winter |
| 12.4V | About 75% | Charge it and retest |
| 12.2V | About 50% | Charge it; test again in 24 hours |
| 12.0V | About 25% | Charge fully; plan on replacement if it won’t hold |
| Below 11.9V | Discharged | Charge and have it load tested |
A battery that reads low once may just need a full charge, especially after a lot of short trips. A battery that reads low again 24 hours after a full charge is telling you it can’t hold power. That’s your replacement signal, and it’s far better to hear it in October than on a 20°F morning.
If you do get caught with a dead battery, the On the Rise walkthrough on how to jump-start a car covers the safe connection order.
Mistakes that cost you time and money
- Testing right after driving. The alternator leaves a surface charge that can make a weak battery read 12.7 volts for an hour. Let it rest first.
- Skipping the cranking test. Resting voltage only shows charge, not strength. A battery can read 12.5 volts and still collapse under the load of a cold start.
- Ignoring corrosion. Crusty terminals can cause hard starts on a perfectly good battery. Clean them before you buy anything.
- Replacing the battery when the alternator is the problem. If the running voltage doesn’t climb above about 13.7 volts, a new battery will just drain again.
- Waiting for the first no-start. A battery past 3 years old in a hot climate is on borrowed time. Testing costs nothing; a tow costs a lot more.
Disposing of an old car battery the right way
Most guides skip this section, but it matters. A car battery is full of lead and sulfuric acid, and in most states it’s illegal to put one in household trash.
The good news is that lead batteries are the most recycled consumer product in the country. Battery Council International and the EPA both report a recycling rate of 99% for lead batteries in the U.S. (EPA).
Here’s how to handle yours:
- Return it where you buy the new one. Most auto parts stores and retailers that sell batteries take the old one back, and many add a refundable core charge to the new battery’s price until you return the old one.
- Transport it upright in a sturdy box or plastic tub so it can’t tip and leak.
- Never store an old battery inside your home. A garage shelf, upright, away from kids and pets, is the place for it until drop-off.
- Check your local household hazardous waste site if you can’t return it to a retailer.
The bottom line
A 15-minute battery check before the first freeze tells you whether your battery is ready, needs a charge, or needs replacing, and it lets you make that call on your schedule instead of the weather’s. Read 12.6 volts at rest, stay above about 9.6 volts while cranking, and see 13.7 to 14.7 volts with the engine running, and you’re in good shape.
Grab a multimeter this weekend and go do the job. On the Rise is built on real advice from people who actually use this stuff, and this is one of the best first tests you can learn.
Johnny Chen, October 7, 2026