
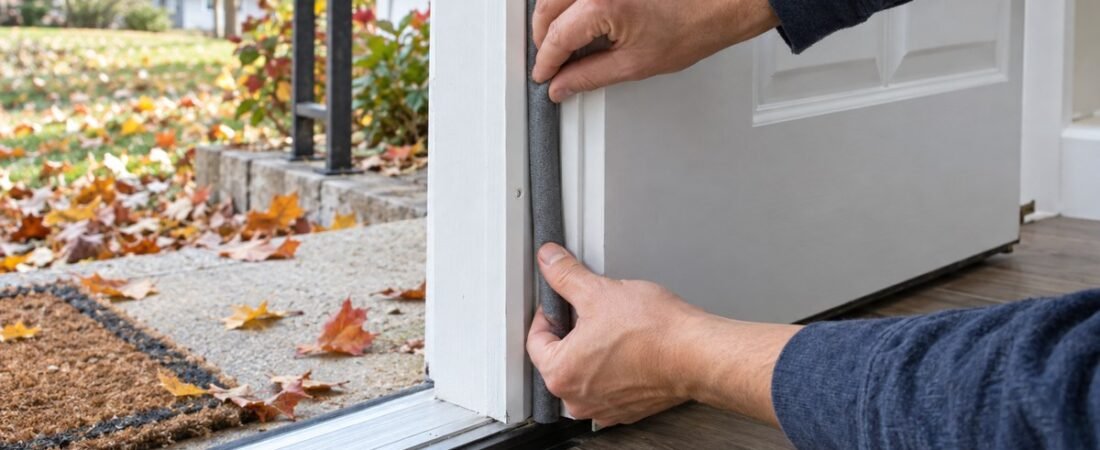
A drafty door is the kind of problem you notice every evening from October to March: a cold stripe of air across the floor, a whistle on windy nights, a light line under the door when the porch light is on. Learning how to weatherstrip a door takes about 1 hour, costs somewhere between $10.00 and $50.00 in materials for most doors, and needs nothing more than a tape measure, a utility knife and a screwdriver.
Here at On the Rise, the goal is honest, no-fluff advice, and that includes being straight about what weatherstripping does and doesn’t do. This guide covers how to find the leak, which type of seal fits your gap, how to install it and the mistakes that make a new seal fail by January.
What weatherstripping will and won’t do for you
Start with the honest version. The Maryland Energy Administration notes that weatherstripping that blocks drafts around doors and windows won’t save much energy by itself, because those drafts contribute little to overall heat loss (Maryland Energy Administration). What it will do is make the room feel noticeably more comfortable, and that can save energy indirectly, since you may not need to turn the thermostat up as much.
The bigger savings come from sealing the whole house. ENERGY STAR estimates that air sealing plus added insulation saves homeowners an average of 15% on heating and cooling costs, with higher savings in colder northern climates (ENERGY STAR). A door is 1 piece of that system, and usually the cheapest and fastest piece to fix.
So treat this as a comfort fix with a modest energy bonus. That is still worth a Saturday morning.
Find the leak first
Don’t buy anything until you know where the air is getting in. You have 4 easy tests:
- The paper or dollar-bill test. Close the door on a sheet of paper or a dollar bill. If it slides out easily, the seal at that spot needs work (Virginia Cooperative Extension). Repeat every 12 inches along the top and both sides.
- The flashlight test. At night, with the lights off inside and out, have a helper move a flashlight slowly around the outside edge of the closed door. If you can see light from inside, that’s a gap (Virginia Cooperative Extension).
- The noise test. Open the door a fraction, listen to the outside noise, then close it. If you can still hear the street clearly, there’s a draft. A good seal cuts out most of the noise (BC Hydro).
- The temperature test. If you own an infrared thermometer, run it along the frame. BC Hydro flags a change of 5°C (about 9°F) or more as a leaky spot (BC Hydro).
Mark each leak with painter’s tape. You’ll also want to note whether the gap is at the sides and top, at the bottom, or both, because those are different fixes.
Pick the right weatherstripping for your gap
Not all seals perform the same, and this is where measure twice, buy once pays off. The Maryland Energy Administration says closed-cell foam with rubber tapes and strips with a tight-sealing rigid gasket both work well, while reinforced felt and open-cell foam are much less effective. Inch for inch, reinforced felt can leak more than 250 times as much air as closed-cell foam (Maryland Energy Administration).
Here’s the honest comparison for the top and sides of a door:
- Closed-cell foam or EPDM rubber tape — self-adhesive, cuts with scissors, best along the door jamb. Budget about $5.00 to $12.00 per door. Easiest install, shortest life on a door that gets slammed daily.
- V-strip (tension seal) — a folded vinyl or metal strip that springs open to fill the gap. Works on the top and sides of doors (BC Hydro). About $5.00 to $25.00. Holds up better on high-traffic doors.
- Rigid gasket strips — a rubber or vinyl bulb on a wood or metal backing that screws or nails to the door stop. About $15.00 to $35.00 per door. More work, longest life.
For the bottom of the door:
- Door sweep — a strip of rubber, vinyl or brush that mounts to the bottom of the door. About $15.00 to $40.00 (Citizens Utility Board).
- Threshold seal — a rubber insert that fits into an adjustable threshold. Check whether your threshold has a replaceable insert before buying a sweep.
A quick decision guide: gap under 1/8 inch, use thin foam tape or V-strip. Gap of 1/8 to 1/4 inch, use thicker foam or a bulb gasket. Light under the door, add a sweep or replace the threshold insert. If the gap is wider than about 1/2 inch, the door or frame is probably out of square, and weatherstripping alone won’t close it.
What you need
- Tape measure
- Utility knife or sharp scissors
- Mild soap, water and a rag, or rubbing alcohol
- Screwdriver or drill (for sweeps and gaskets)
- Pencil
- Your weatherstripping, plus 10% extra for mistakes
- Painter’s tape for marking leaks
Step-by-step: weatherstrip the top and sides
- Measure the jamb. Measure the top and both sides of the door frame where the door closes against the stop. Most standard exterior doors need about 17 feet total.
- Remove old weatherstripping. Pull it off and scrape away any leftover adhesive or nails you find.
- Clean the surface. Wash with soap and water and let it dry completely before applying anything (Citizens Utility Board). Your adhesive will not stick to dust or old residue, no matter how hard you press.
- Cut to length. You need 1 piece for the top and 1 for each side. Cut clean, square ends so the corners meet tightly.
- Install along the stop. Weatherstripping should go on the door jamb so it seals against the outside face of the door on the top and both sides (Virginia Cooperative Extension). Peel a few inches of backing at a time and press firmly as you go.
- Fit the corners tight. If you leave gaps at the corners, that is where your new install will still leak.
- Close the door and test. The door should close and latch with light pressure. If you have to lean on it, the seal is too thick.
- Rerun the paper test at the spots you marked.
Step-by-step: install a door sweep
- Close the door and hold the sweep against the inside face so the rubber or brush just touches the threshold. Place it so no light comes through.
- Mark the screw holes with a pencil while you hold it in place.
- Pre-drill small pilot holes, about 1/16 inch, so you don’t split the door.
- Screw the sweep on and test the door. It should open without dragging hard on the floor or rug.
- Adjust the height using the slotted holes if it drags or leaves a gap.
Mistakes that make new weatherstripping fail
- Skipping the cleaning step. If you skip it, you can expect trouble. This is the number 1 reason adhesive foam peels off within weeks.
- Buying open-cell foam or felt for an exterior door. Cheap, easy and far less effective. For an outside door that sees weather every day, it’s not worth the savings.
- Going too thick. A seal that’s too thick strains your latch and can make the door hard for you to lock.
- Stretching the strip. Pulling foam tape tight while you install it thins it out, and it shrinks back later and leaves gaps.
- Ignoring the bottom. Sealing the top and sides while light still shows under the door leaves the biggest leak in place.
- Installing in the cold. Most adhesives bond best above about 50°F. If it’s colder, warm the frame with indoor air first, or wait for a mild afternoon.
The bottom line
Find the leak with a dollar bill or a flashlight, match the seal to the gap, clean the frame and press it in tight at the corners. It won’t cut your heating bill in half, and nobody at On the Rise will pretend otherwise. It will stop the cold stripe across your floor and make the room feel warmer for the next 5 months.
You’ve got this.
Johnny Chen, October 16, 2026