
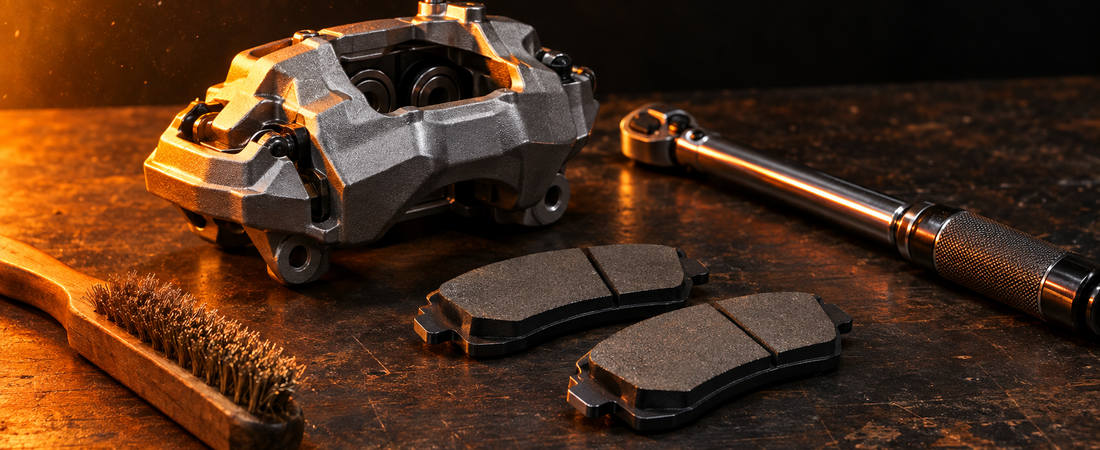
The squeal starts at a stoplight, faint enough to blame on the road. A week later it shows up every time you slow down. Then it changes character, from a high metallic squeak to something lower and rougher, and that change is the whole story of this job.
Squealing is a designed warning. A small metal tab built into the pad reaches the rotor once the friction material wears thin, and the noise it makes is the pad telling you it has hours left, not weeks (AutoZone, How to Check Brake Pads). Grinding is different. Grinding means the friction material is gone and the steel backing plate is riding directly on the rotor, which requires immediate attention because the damage gets worse the longer it continues (AutoZone). A pad set costs 40.00 to 90.00 dollars. The pair of rotors you destroy by driving on backing plates costs 200.00 to 400.00 dollars on top of that.
This guide walks the whole system: how to read what you are looking at, what the job asks of you, and the 3 situations where your right move is to close the hood and call a shop. On the Rise does not pretend every repair belongs in a driveway.
Safety: the rules that are not negotiable
Brakes are the one system on your vehicle where a mistake does not give you a second attempt.
Never work under a vehicle held up by a jack alone. A hydraulic jack is a lifting device, not a support device. Park on a dry, flat surface, install your wheel chocks, raise the vehicle from a secure jack point, then lower it onto jack stands rated above your vehicle weight before any part of you goes near the wheel well (AutoZone, How to Change Brake Pads and Rotors). This is non-negotiable. People are killed every year by vehicles that came off a jack, and 60.00 dollars of jack stands prevents it.
Break the lug nuts loose while the wheel is still on the ground. A wheel spins in the air, and a breaker bar on a spinning wheel is how you break your knuckles. Loosen each nut about a quarter turn, then lift.
Work on 1 axle at a time and replace pads in complete axle sets. Pads wear as a matched pair. Replace 1 side only and you guarantee uneven braking force, which pulls your vehicle sideways under hard stops.
Wear safety goggles and gloves. Brake dust is unpleasant and brake cleaner is aggressive. Keep both away from your eyes and your skin.
Never let the caliper hang by its brake hose. The hose is a pressure line, not a strap, and if a dangling caliper stretches or kinks it, your system is dead in the water with a fresh fluid leak.
Torque every fastener to the manufacturer specification with a torque wrench. Not by feel. Not until it stops turning.
When to stop and call a shop
There are 3 conditions that move this job out of your driveway, and none of them reflect badly on your ability.
An electronic parking brake on the rear axle. On vehicles with an electronic parking brake, the rear caliper pistons are driven by an actuator motor and must be retracted through a scan tool service mode before the pads come out. Forcing those pistons back mechanically risks damaging the actuator motor, and the specific warning from the tool manufacturers is to never force the pistons back with pliers (TOPDON, EPB Retract: Electronic Parking Brake Service Mode). Without the scan tool, rear pads on an electronic parking brake vehicle are not your job. Your front pads on the same vehicle usually still are.
A soft or spongy pedal. Worn pads do not make a pedal feel soft. They make it travel slightly further. Sponginess points at air in your lines, a failing master cylinder, or a fluid leak, and all 3 are hydraulic problems that new pads will not fix. A hydraulic fault misread as a pad problem is the most dangerous mistake in this job.
A caliper bracket bolt that will not move. Those bolts carry 70 to 130 ft-lbs of torque and live in road salt and brake dust (AutoZone, Brake Caliper Torque Specs). A seized one can strip your knuckle threads, and a stripped knuckle is a suspension repair. Penetrating oil and patience are worth your time. A breaker bar plus your full body weight is not.
The tools, and what they actually do
- Torque wrench, 20 to 150 ft-lb range. The 1 tool you cannot substitute. Guess at caliper torque and you are guessing about whether your wheel stays on.
- Breaker bar with a 6-point socket for the lug nuts. A 6-point socket grips the flats instead of the corners, so it will not round off a stubborn nut.
- Socket set covering 12mm through 19mm. Guide pin bolts commonly have 12 to 14mm heads and caliper bracket bolts commonly have 17 to 19mm heads (AutoZone). A basic set covers you, and the socket set comparison already published here covers which ones hold up.
- Jack stands rated above your vehicle weight, plus a hydraulic jack and wheel chocks.
- Disc brake pad spreader or a large C-clamp to press the piston back into the caliper bore.
- Brake cleaner and a wire brush for the bracket seats.
- Brake grease for the guide pins and pad ears. Never on the friction surface.
- A caliper hook or bungee cord so the caliper never hangs on the hose.
That list runs 120.00 to 250.00 dollars if you own none of it, and every item stays useful for your next repair. On the Rise runs no sponsored placements and no affiliate deals, so that figure reflects what the tools cost rather than what somebody wants to sell.
Step by step
1. Measure before you buy anything. Look through your wheel spokes at the pad pressed against the rotor. Replacement is due when friction material reaches ¼-inch or less at the thinnest point on either the inner or outer pad, or when the pad has worn to the depth of the wear indicator groove (AutoZone). A more aggressive threshold puts the pad at the end of its life at 1/8-inch, roughly 3mm, at any point (Edmunds, How to Change Your Brake Pads). Measure twice, buy once — check both pads on both wheels of the axle, because the thinnest one sets your schedule.
Why this matters: it decides whether you need pads only or pads and rotors, and that doubles the parts cost.
2. Inspect the rotor while the wheel is still on. Run your fingernail across the face. Deep grooves, scoring, or a lip at the outer edge mean the rotor needs replacing or machining rather than reuse. Vibration through your pedal under braking points at a warped rotor, and grooved surfaces point at scoring (Edmunds).
Why this matters: new pads on a scored rotor wear into the grooves and lose contact area.
3. Chock, loosen, lift, support. Chocks in, lug nuts a quarter turn loose, jack from the marked point, vehicle down onto stands, wheel off.
Why this matters: this order keeps your vehicle on the stands and your wheel from spinning while you pull hard on a bar.
4. Remove the guide pin bolts and lift the caliper. These are the smaller bolts, typically 12 to 14mm heads, holding the caliper body to the bracket. Hook the caliper up the moment it comes free.
Why this matters: the hose is the only other thing holding your caliper, and it was never designed to carry that weight.
5. Slide the old pads out and note the hardware. Clips, shims and wear sensors come out in a specific arrangement. Photograph it before you disturb anything.
Why this matters: install your clips backwards and you recreate the squeal you just paid to eliminate.
6. Clean the bracket seats and lubricate the contact points. Wire brush the rust off the abutment surfaces, brake cleaner them, then lay a thin film of brake grease on the pad ears and guide pins. Keep grease off the friction face and off the rotor.
Why this matters: a pad that cannot slide freely in a gummed-up bracket drags, overheats, and wears unevenly.
7. Compress the piston. Press it back into the bore with a spreader or C-clamp, slowly, using an old pad as a pressure plate. Open the bleeder or watch your reservoir so displaced fluid has somewhere to go. If your vehicle has an electronic parking brake at that corner, stop and reread the section above.
Why this matters: forcing fluid backward through a corroded ABS unit can damage seals, and forcing an electronic piston damages the motor.
8. Fit the new pads and reassemble. Pads in, caliper down over them, guide pin bolts started by hand, then torqued. Guide pin bolts commonly call for 15 to 35 ft-lbs and bracket bolts 70 to 130 ft-lbs, with published examples running 80 ft-lbs front on a Honda Accord, 70 to 77 ft-lbs front on a Toyota Camry, and 129 ft-lbs front on a 2013 to 2017 Ford Escape (AutoZone). Look up your own vehicle rather than borrowing a number from that range.
Why this matters: under-torque your caliper bolts and they back out; over-torque them and they stretch or snap. Both end with a caliper loose inside your moving wheel.
9. Wheel on, lower, torque the lug nuts in a star pattern. Tighten with the wheel just touching the ground, in a criss-cross sequence, to the figure in your owner’s manual.
Why this matters: sequence keeps your wheel seated flat against the hub. Tighten in a circle and you cock it and warp your new rotor.
10. Pump the pedal before moving. With the engine off, press your brake pedal repeatedly until it goes firm. The pistons need to travel back out to meet the new pads.
Why this matters: the first pedal press after a pad change goes almost to the floor. Discover that while rolling and you dent something.
11. Bed the pads in. New friction material has to lay a transfer film onto the rotor before it works properly. The ADVICS 30-30-30 rule is the clearest version: 30 slow stops, from 30 mph, with at least 30 seconds of cool-down between them, and no hard or severe braking for the first 400 to 500 miles (ADVICS/AISIN, Bedding-In Brake Rotors and Brake Pads). A shorter street procedure calls for 6 to 10 stops from 30 to 35 mph, then 2 to 3 harder stops from 40 to 45 mph, then 15 minutes of cooling with the vehicle parked and the brakes released (Hawk Performance install and bed-in instructions). A third bulletin specifies 5 to 10 gentle stops from 20 to 30 mph followed by moderate stops from 30 to 40 mph, and warns against repeated hard stops for the first few hundred miles to prevent glazing (FAI Automotive TB0097, Brake Pad Bedding-In Guide).
Why this matters: skip it and you glaze the pad surface, and glazed pads stop worse than the worn ones you removed.
Mistakes that cost money
Reusing a rotor that measures under its discard thickness. Every rotor has a minimum thickness figure cast or stamped into it. Under that number your rotor cannot absorb heat safely and is scrap, not a candidate for machining.
Tightening by feel. Repeated here because it is the most common failure on a first brake job.
Grease on the friction surface. Any contamination on the pad face or rotor face destroys braking. If you are reusing a rotor, clean it: sand with 130-grit paper under moderate pressure, then soap and water, then confirm the surface is free of oil, grease and brake fluid (Hawk Performance).
Skipping the bed-in. Your pads work at a fraction of their rated performance and nobody connects the weak braking to the shortcut you took 2 weeks earlier.
Topping off the reservoir before compressing the piston. Compression pushes fluid back up. Fill first and it overflows onto your paint, which brake fluid strips.
Replacing pads to fix a pull or a vibration. Pulling under braking is usually a sticking caliper or collapsed hose. Vibration is usually a warped rotor. Neither is a pad problem, and new pads on either fault leave you with the same symptom and a lighter wallet.
Disposal and the legal side
Most guides skip this part, which is how brake parts end up in household trash where they are not permitted.
Brake fluid is hazardous waste. Glycol-ether based fluid cannot go down a drain, into a storm sewer, or into a household bin. It goes to a hazardous waste facility or an auto parts store that accepts fluid returns. Many do, at no charge.
Old pads may contain copper and other regulated metals. Several states restrict copper content in friction material, which is why pad formulations changed across the industry. Used pads belong in scrap metal recycling rather than general refuse.
Rotors are clean scrap steel. A pair runs 15 to 25 pounds of cast iron, and scrap yards pay for them.
Brake dust contains metal particulates. Sweep it and bag it. Do not hose it into a storm drain, which routes untreated to surface water in most municipalities.
Keep the receipt and the mileage. A warranty claim needs your install date and odometer reading. A photograph of the receipt beside your dash is enough.
Check your municipal hazardous waste schedule before you start, because your fluid needs somewhere to go the same day.
Go do the job
Front pads on a vehicle with a conventional parking brake, a firm pedal, and bolts that move are a genuine driveway repair. Budget 2 hours for a first attempt, work 1 axle at a time, torque every fastener to the number in your manual, and bed the pads in before you trust them.
Rear pads behind an electronic parking brake, any spongy pedal, or a seized bracket bolt are the shop’s job, and recognising that is mechanical judgment rather than a shortfall in it. On the Rise would rather you finish a job well than start one that finishes you.
Measure your pads first. Everything else follows from that number.
Mechanic Guide — September 23, 2026