
by Johnny Chen
The next time you pull an old picture hook out of the wall and discover something closer to a crater than a clean hole, you’ll want to know exactly how to fix a hole in your wall before you touch a single tool. Whatever caused the damage, a doorknob, an anchor, or years of settling, the right method depends almost entirely on how big the hole actually is.
This guide walks through every size of wall damage, from a shallow nail pop to a hole big enough to fit your hand through. You’ll know exactly which materials to grab, how to apply them correctly, and how to finish the repair so the patch disappears under paint. When you’re ready to pick up the right putty knife or sanding block for the job, On the Rise has honest, no-fluff tool reviews to help you shop smart without overbuying.
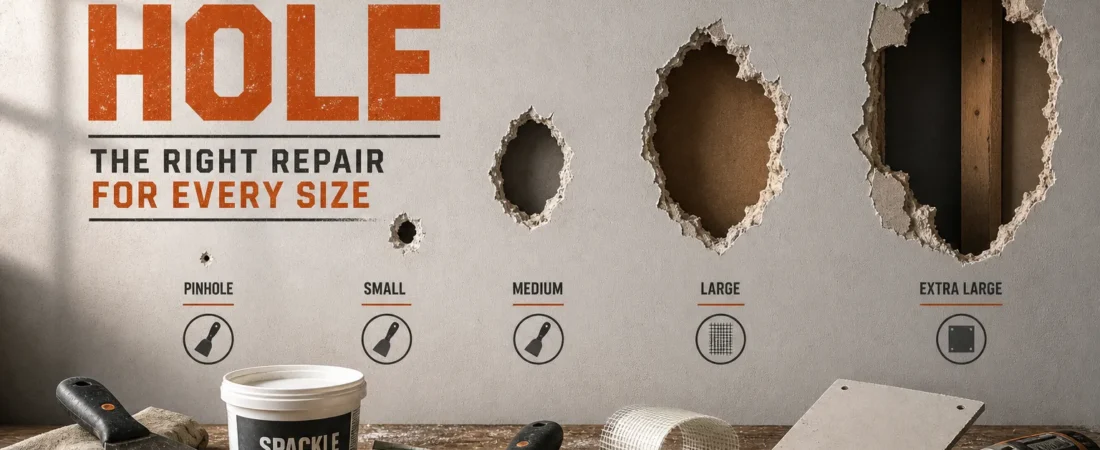
How to fix a hole in your wall: match the method to the size
Starting with the right method saves you time, money, and the frustration of redoing the work. The size of the hole determines everything: what you buy, how long the job takes, and whether you need structural support behind the repair or just a dab of filler.
Tiny holes: nail pops and shallow dents
Nail holes and small dents need nothing more than lightweight spackle pressed in with a putty knife, dried, and sanded flush. This is a one-coat job for most repairs. One step most guides skip: if the nail head is popped up slightly, press it back below the surface with a putty knife before you fill. Filling over a raised nail head creates a small bump that shows through paint.
Small holes from half an inch to about an inch
A self-adhesive mesh patch handles this size cleanly. Press the mesh over the hole, then apply two thin coats of spackle or lightweight joint compound over it, feathering the edges outward. Wall patch kits sold at hardware stores bundle the mesh and compound together, which is worth the small upcharge so you don’t make a second trip back for a forgotten tube of filler.
Medium holes from 1 to 6 inches
This size range needs structural support behind it, not just filler. The California patch method or a precut drywall patch backed by wood strips gives the compound something solid to bond to. Expect a full-day job here because multiple coats of joint compound each need adequate drying time before the next goes on.
Large holes over 6 inches
Large holes require cutting back to the nearest studs or adding wood framing, then fitting a new section of drywall into the opening. Plan for a two-day minimum: one day to hang and tape the patch, another day for the final coats of compound. This is also the one size category where calling a professional starts to make financial sense, especially if you’re dealing with multiple large holes or structural damage nearby.
What you need before you start patching
Walking into the hardware store without a clear list is how you end up buying too much of the wrong thing. The materials vary by repair type, so matching your supply run to the hole size keeps the project efficient from the start.
Fillers and patching materials by repair type
Lightweight spackle is the right call for small repairs. It dries faster, shrinks less, and sands easily. All-purpose joint compound is the better choice for medium-to-large patches that need multiple coats feathered out over a wide area. Pre-mixed spackle in small tubs is the easiest starting point for beginners because it stays workable, cleans up with water, and doesn’t require mixing.
If you’re working on an older home with plaster walls rather than drywall, the process shifts slightly. Plaster repairs typically call for a setting-type compound or dedicated plaster patching compound rather than standard spackle, which doesn’t bond as reliably to plaster substrates. For small plaster cracks and holes, dampen the surrounding surface before applying compound to slow absorption and improve adhesion. Deep plaster repairs may need two or three layers of patching compound built up gradually, just as you would with drywall.
One patch kit worth grabbing at the hardware store
The DAP DryDex wall repair kit is a solid all-in-one option available at major hardware stores for around $10 to $15, and it handles everything from nail holes to small-to-medium repairs in a single purchase. It includes a color-changing compound that turns from pink to white when fully dry, which takes the guesswork out of knowing when to sand. For beginners who want a simple, low-risk first repair, this kit removes several steps from the learning curve.
Tools that actually matter for this job
You need a 3-inch and a 6-inch putty knife, a sanding block or sanding sponge in both 120-grit and 220-grit, and a utility knife. Keep a damp rag nearby for wiping tool edges and cleaning up excess compound before it cures. The flexibility of your putty knife matters more than most people expect: a stiff knife is harder to feather smoothly, while a slightly flexible blade lets you apply even pressure across the patch. On the Rise’s tool review section has straightforward picks for both putty knives and sanding blocks so you buy exactly what you need and nothing extra.
Step-by-step: repairing small and medium holes
The two most common repairs a beginner faces are the mesh patch for small holes and the backed drywall patch for medium holes. Both follow the same basic sequence: prep, fill, sand, repeat. Skipping any step, especially prep, is the single biggest reason a patch shows through paint later.
Prep the surface before you fill anything
Clean the hole edges, press back any raised drywall paper, and remove loose dust and debris with a damp rag. If the hole has a ragged or torn edge, use a utility knife to trim it back to clean, stable drywall. Nothing loose should remain inside or around the opening before compound touches the wall.
Apply compound in thin coats, not one thick layer
Spread the first coat of spackle or joint compound slightly proud of the wall surface, then let it dry fully before adding a second coat. Standard spackle is typically sandable in one to two hours; joint compound needs closer to 24 hours per coat for medium repairs. Two or three thin coats always produce a better result than one thick one because each thin layer dries evenly and shrinks less.
Sand smooth, check with raking light, repeat
Use 120-grit between coats to knock down ridges, then finish with 220-grit for the final pass. After your last sanding, hold a flashlight at a low angle to the wall: any ridges or low spots catch the raking light immediately. If you see a transition, add a third coat and feather the compound at least 8 to 10 inches past the edge of the repair before sanding again.
How to handle a large drywall hole the right way
Large hole repairs have more steps than small ones, but none of them are difficult. The key is solid backing and patient mudding. Rush either of those and you end up with a seam that cracks or a ridge that shows up months later when the light hits the wall at a flat angle.
Cut a clean opening and install backing strips
Mark a clean rectangle around the damaged area and cut it out with a drywall saw. Screw 1×3 or 1×4 pine strips behind each cut edge so half the strip sits inside the opening and half grips the existing drywall. Solid backing is what separates a lasting repair from one that flexes, cracks, and sags over time.
Secure the patch piece and tape the seams
Cut the replacement drywall piece to fit snugly inside the opening and screw it to the backing strips. Apply paper tape or fiberglass mesh tape over every seam before you add any joint compound. Tape goes on before the first coat of mud, not after: a common beginner mistake is applying compound first, then trying to press tape over it, which creates air bubbles and weak seams.
Mud, dry, sand, and do it three times
A large patch needs three full coats of all-purpose joint compound with 24 hours of drying time between each coat. Widen your feather on each successive coat so the third coat extends 12 inches or more past the original seam. Sand lightly between coats with 120-grit, and use 220-grit on the final pass. Rushing this step is the top reason visible seam lines ghost through paint after the job is done.
Matching texture and finishing the repair
This is the step where a mechanically solid repair either disappears or announces itself. A perfectly smooth patch on a knockdown wall stands out just as much as a poorly filled hole. Matching the surrounding texture before you prime is what makes the repair invisible.
Identify your wall texture before you touch it
Hold a flashlight at a low angle to the wall and read the pattern carefully before doing anything else. The three most common textures are smooth (no surface pattern), orange peel (small bumpy dots), and knockdown (flattened splatter peaks with irregular shapes). Practice your replication technique on cardboard or scrap drywall before going near the repaired area.
How to replicate smooth, orange peel, and knockdown
For smooth walls, feather the compound wide, sand with 220-grit, and check under strong side lighting to catch any remaining ridges.
For orange peel, thin joint compound with water until it’s loose, then apply it with a stiff brush, texture sponge, or aerosol texture can in light passes. Test on cardboard first and adjust the consistency until the dot size matches the surrounding wall.
For knockdown, spray or dab the thinned compound onto the surface, let it set for two to three minutes until it loses its shine, then drag a wide knife lightly across to flatten the peaks. Timing is everything here: too soon and you smear it, too late and the peaks won’t flatten.
Prime the patch before you paint, every time
Fresh joint compound and spackle absorb paint differently than the surrounding wall, causing a dull or shiny spot called flashing. A spot prime coat over the repaired area seals the surface so paint absorbs evenly across the whole wall. Skip primer after all that prep work and the patch will still be visible under the finish coat, no matter how well it was filled and sanded.
Common mistakes that make a patch visible
Most visible patches aren’t the result of bad technique. They come from a handful of specific, avoidable shortcuts. Knowing these upfront means you won’t be staring at a lumpy wall later and wondering where things went sideways.
Rushing the coats and skipping primer
Applying a second coat before the first has fully dried causes soft spots, bubbling, and an uneven surface that no amount of sanding fixes cleanly. Then skipping the primer undoes all that careful work in one step: the compound flashes through the paint and the patch is still visible. Do both, and do them in order.
Not feathering the edges far enough
A stopped edge looks like a slight hump or ridge under paint, especially in natural light. For medium and large patches, compound should be feathered at least 8 to 12 inches past the edge of the repair, and sometimes wider. Use a 6-inch knife for the first coat and a 10-inch or 12-inch knife for the final coat to get a gradual, invisible transition.
Texture mismatch after a clean patch
A flat, flawlessly sanded patch on a knockdown wall still looks wrong. Match the texture before you prime, not after, because priming over the wrong texture locks it in. Older walls with significant sheen or color fade sometimes call for a full-wall repaint rather than spot-matching: it’s a cleaner result and, in most cases, not much more work once you’re already holding a roller.
You’ve got this
The size-to-method framework is the whole game. Tiny holes get spackle, small holes get a mesh patch, medium holes get backing and multiple coats of compound, and large holes get a full drywall section. Every one of those repairs is genuinely doable on a weekend with basic tools and a little patience, and now you know exactly how to fix a hole in your wall at any size.
The four things to keep in mind throughout: thin coats, full drying time, wide feathering, and primer before paint. Follow those and the patch will disappear under the finish coat. Skip any one of them and the wall will remind you every time the light hits at a flat angle.
When you’re ready to build out your toolkit for this repair or the next one, head over to On the Rise for unbiased reviews on putty knives, sanding blocks, and everything else you need to get the job done right without buying gear you’ll never use again.